
Get in touch with us today and our team of imaging professionals will be pleased to assist you.
Troubleshoot Network Interface Cards and Camera Links
Use this topic when a directly connected Emergent camera is not detected, does not establish the intended Ethernet link, or does not stream reliably.
This topic covers basic NIC and camera-link checks. It does not replace Hardware Installation, advanced network-design guidance, or software-specific troubleshooting.
For initial NIC installation and verification, see Install and Verify a Network Interface Card.
Before you begin
Record:
- NIC model, installed driver version, if available, and PCIe slot details
- Camera model and firmware version
- Host computer and operating system
- eCapture Pro and acquisition-software versions
- Cable, transceiver, or other connection-hardware model
- Link-indicator status, reported link speed, and error messages
- Whether the issue affects one camera connection or the complete system
Determine whether the issue affects one camera connection or all connections. This helps isolate the camera, cable, NIC port, NIC, or host computer.
Follow the troubleshooting workflow
Check the system in this order:
- Verify NIC detection.
- Verify the Ethernet link.
- Verify the intended link speed.
- Verify camera discovery.
- Verify image streaming.
- Verify sustained streaming performance.
Change one item at a time. After each change, repeat the failed step.
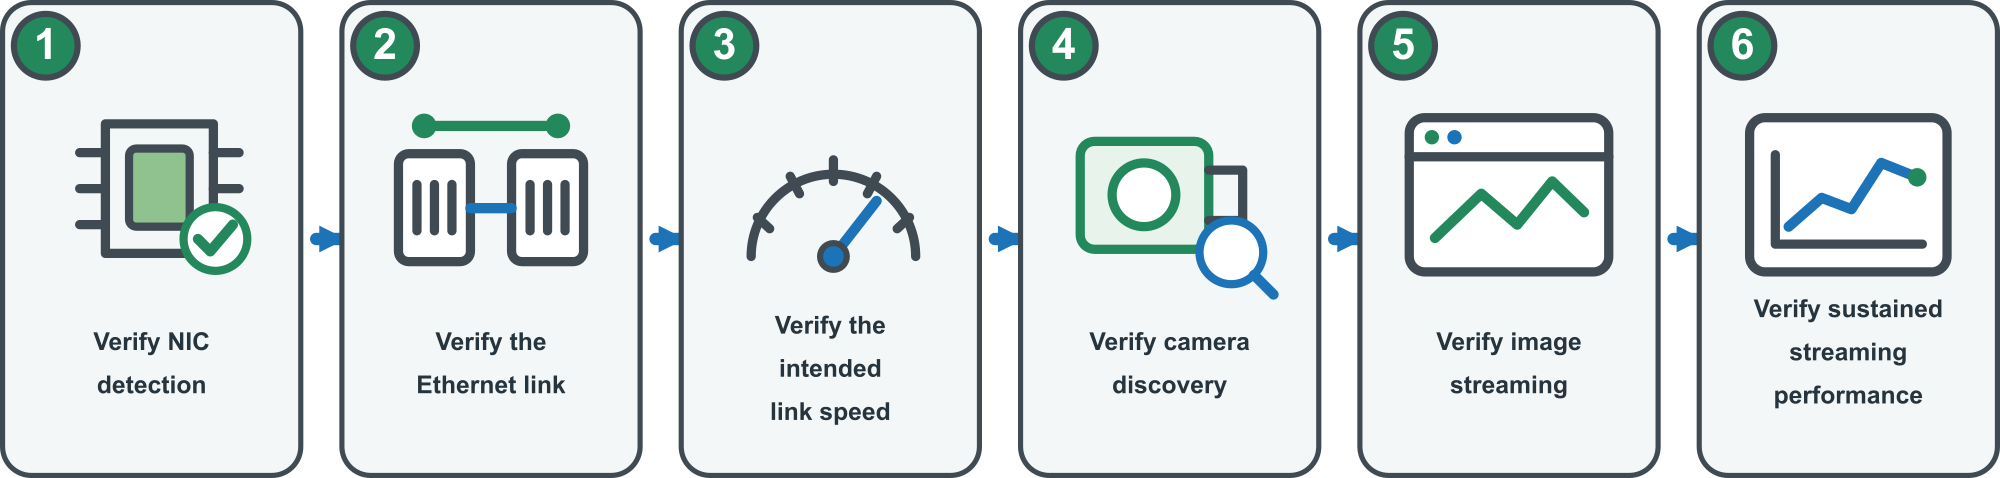
Figure 1: Six-step workflow for troubleshooting NIC and camera-link problems.
The NIC is not detected
- Shut down the host computer.
- Confirm that the NIC is fully seated in the intended PCIe slot.
- Confirm that the slot provides the required PCIe generation and lane width.
- Check that the NIC has no visible damage.
- Restart the computer and confirm that the operating system detects the NIC.
- Confirm that eCapture Pro is installed as described in Software Installation. eCapture Pro installs the required classic eSDK NIC drivers.
- Check the operating system for device or driver errors.
Do not install a driver from the NIC manufacturer unless Emergent directs you to do so.
If the NIC is still not detected, test it in another compatible host computer, if available, or contact Emergent Customer Support.
No Ethernet link
- Confirm that the camera is powered as required.
- Confirm that the cable, transceivers, and connectors are compatible with the camera and NIC.
- Disconnect and reconnect both ends of the connection.
- Check the camera and NIC link indicators.
- Test with a known-good compatible cable or connection component.
- Test another NIC port or camera, where available.
Optional: Perform a NIC loopback test
If the NIC has two available ports, connect the ports with known-good compatible transceivers and a fibre cable.
Confirm that each NIC port detects an active link to the other port. A successful loopback test indicates that the two tested NIC ports, transceivers, and fibre cable are working. It does not confirm that the camera is working.
If only one connection fails in an otherwise working multi-camera system, test the camera and cable on a known-working NIC port.
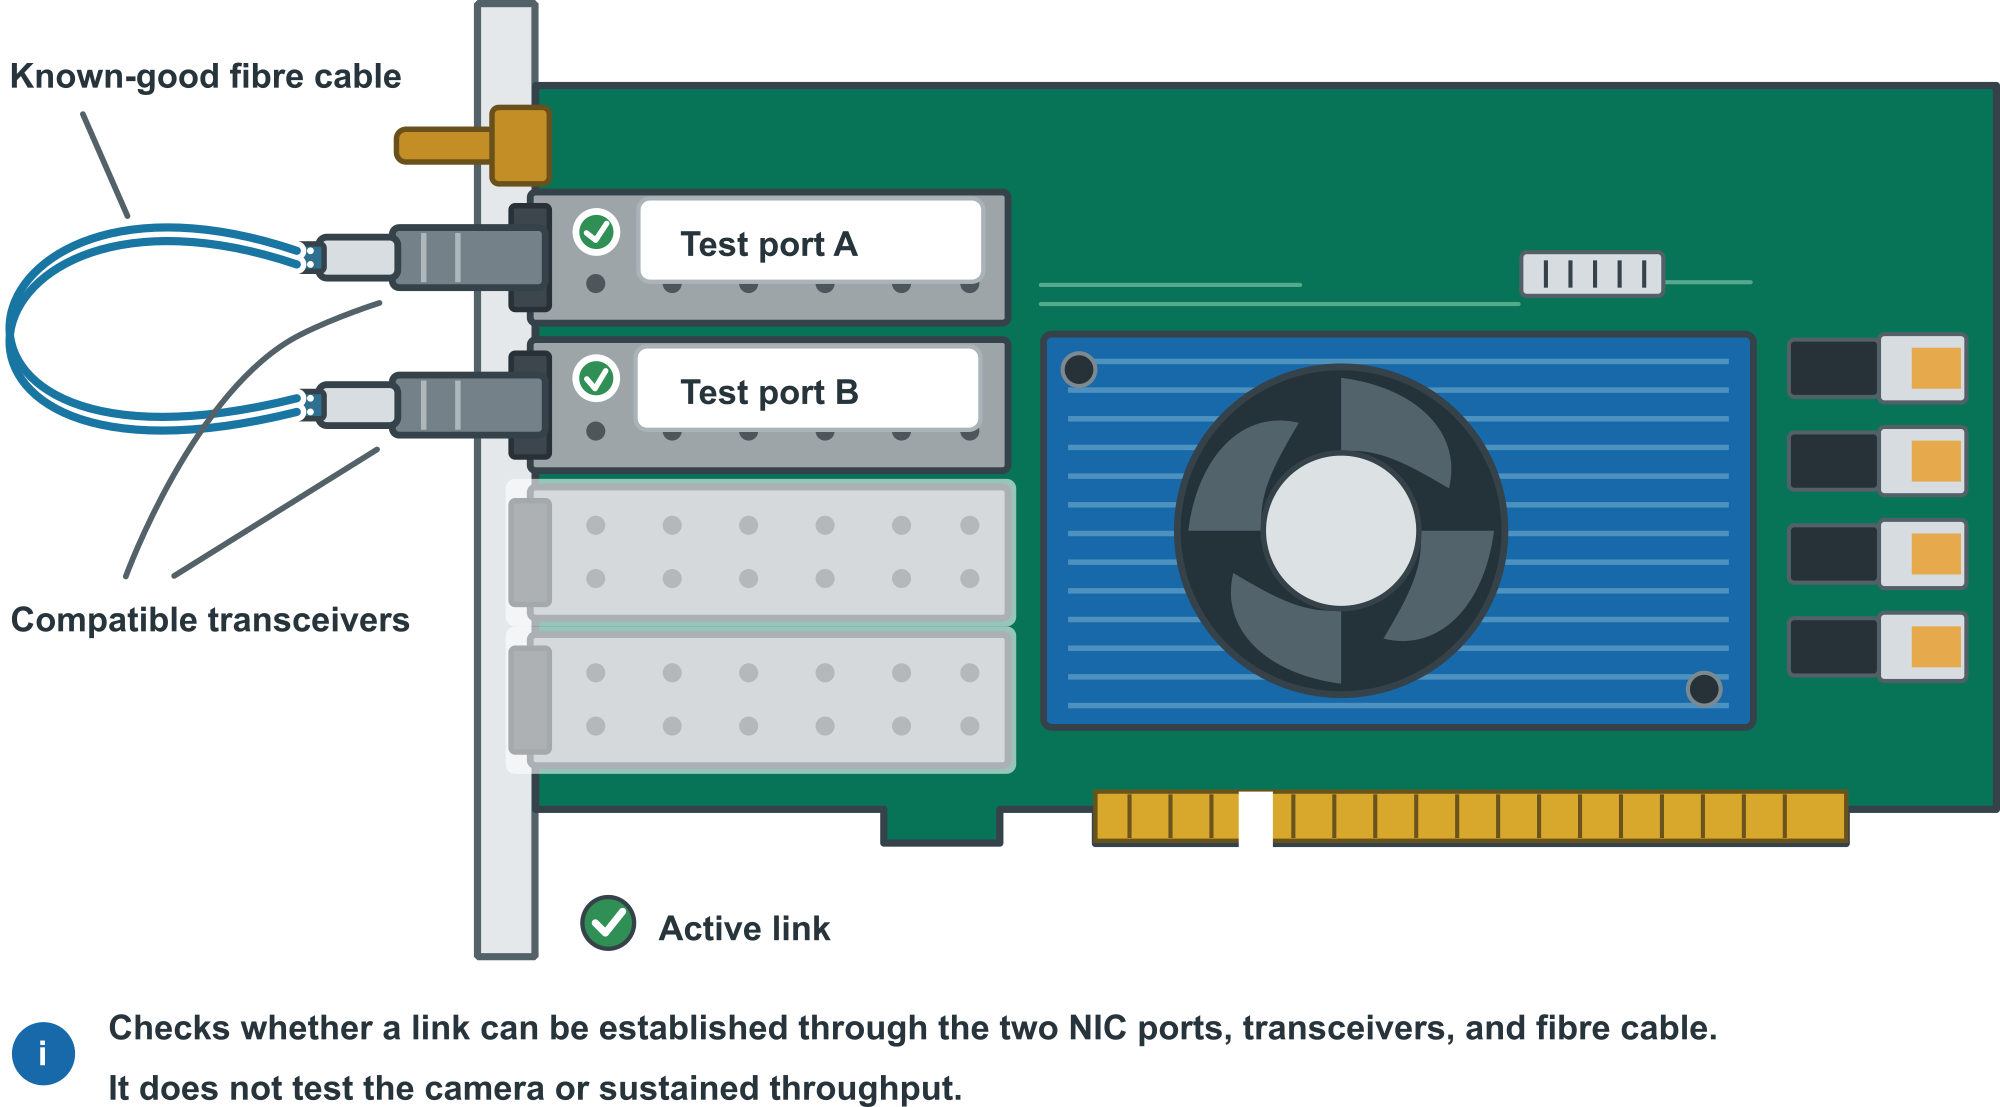
Figure 2: Loopback connection for verifying link establishment between two ports on a NIC
The link speed is lower than expected
- Check the reported link speed in the operating system.
- Confirm that the camera, NIC, cable, and any transceivers support the intended speed.
- Replace suspect cables or transceivers with known-good compatible components.
- Restart the camera and host computer after making hardware changes.
Do not assume that a physical link operates at the intended speed. A reduced link speed can prevent reliable streaming.
The camera is not discovered
- Confirm that the NIC has an active Ethernet link to the camera.
- Confirm that the camera is powered as required.
- Confirm that the camera and NIC use compatible network settings.
- Confirm that firewall or security software does not block discovery or acquisition traffic.
- Restart the camera and acquisition software.
- Test discovery with one camera directly connected to one NIC port.
If the camera is still not discovered, record the camera model, firmware version, NIC model, eCapture Pro version, and network settings before contacting support.
The camera is discovered but does not stream
- Confirm that the correct camera is open in the acquisition software.
- Check software status and error messages.
- Confirm that the link speed matches the planned configuration.
- Set the NIC Jumbo Packet setting to 9000 bytes. Do not leave the setting at Auto.
- Confirm that the NIC and PCIe connection support the required camera data rate.
- Reduce the camera frame rate or image size temporarily to determine whether available bandwidth is the cause.
- Test with a known-working camera, cable, or host configuration, where available.
If reducing the data rate resolves the issue, review the NIC, PCIe, and host-computer bandwidth requirements. See Select a Network Interface Card.
Streaming is unreliable
Symptoms can include incomplete images, dropped frames, acquisition timeouts, or intermittent disconnections.
- Confirm that the NIC, PCIe connection, and host computer support the aggregate data rate.
- Check that the camera link remains at the intended speed during acquisition.
- Test one camera at a time.
- Reduce the camera data rate temporarily.
- If the camera provides a LineTime parameter, increase it temporarily. This can space out camera data and reduce the data rate.
- Check cables, transceivers, connectors, and NIC ports for intermittent faults.
- Check system-resource use during acquisition, including CPU, memory, storage, and network activity.
Increasing LineTime can affect camera timing and frame rate. Record the original value and restore it after the test.
If the issue affects all cameras, prioritize checks of the host computer, NIC, PCIe slot, and aggregate bandwidth. If it affects one camera, prioritize the individual camera connection, cable, transceiver, and NIC port.
Collect diagnostic information
Before contacting Emergent Customer Support, run the eSDK diagnostic script and save its output.
On Linux, run:
sudo python3 /opt/EVT/eSDK/diagnose/evtsysinfo.py
On Windows, open Command Prompt as an administrator and run:
powershell -ExecutionPolicy Bypass -File "C:\Program Files\EVT\eSDK\diagnose\evtsysinfo.ps1"
Contact Emergent Customer Support
Provide:
- NIC model, installed driver version, if available, and PCIe slot details
- Camera model and firmware version
- Host-computer model, operating system, and eCapture Pro version
- Acquisition-software version
- Network topology and connection-hardware models
- Reported link speed and link-indicator status
- Error messages and symptoms
- Output from the eSDK diagnostic script
- Steps already completed
- Whether the issue affects one camera connection or the complete system
See also
Get in touch with us today and our team of imaging professionals will be pleased to assist you.